I run a home media server which I have different media from movies, to tv series to photos which I have taken. I absolutely love it! Now all this media takes up significant storage. I used to have it all on a single hard drive, but I instead come up with a better solution using FreeNAS (now TrueNAS).
I absolutely love TrueNAS, it's a very powerful piece of software which allows you to be able to do many things with it (from running a NAS instance to even running LDAP). I highly recommend you have a look at it if you haven't already.
So this allowed me to setup a Samba share which makes it much easier for me to add content to my media collection. It also then allows me to share this media outside of my media server.
So far all great! Well until the Samba pool on my FreeNAS instance had some corrupted metadata. That was great! Well thankfully since I was running my FreeNAS instance within a VM, I restored a snapshot and I managed to get most of my data back. Now I hadn't backed this up before since the data is still available to me in some shape or form. But I don't want to go through the hassle of trying to correlate all this data should I have a similar issue again. So I decided to look at my backup options:
- Backup to an external drive
- Setup RAID
- Cloud based backup
The first option I was considering but wasn't too keen since it would likely be a manual process. The second I felt too complicated and doesn't cater for a scenario if the entire system was destroyed. The third option was great, until I started looking at costs. For the price of 1 month, I could buy a hard drive for the same price!
So a lightbulb moment happened. I happened to have another box which I had FreeNAS running on that I wasn't using for anything. It also had plenty of capacity as well! When I looked to cloud based backups I saw that FreeNAS could perform what was called a cloud sync. This allows you to sync data from your FreeNAS instance with a cloud service, including popular options such as AWS S3, Dropbox and Google Drive. Another service which FreeNAS provides is a S3 service (using MinIO). So this got me thinking, could I use the AWS S3 option to perform to the S3 service on my other FreeNAS instance? The answer is yes!
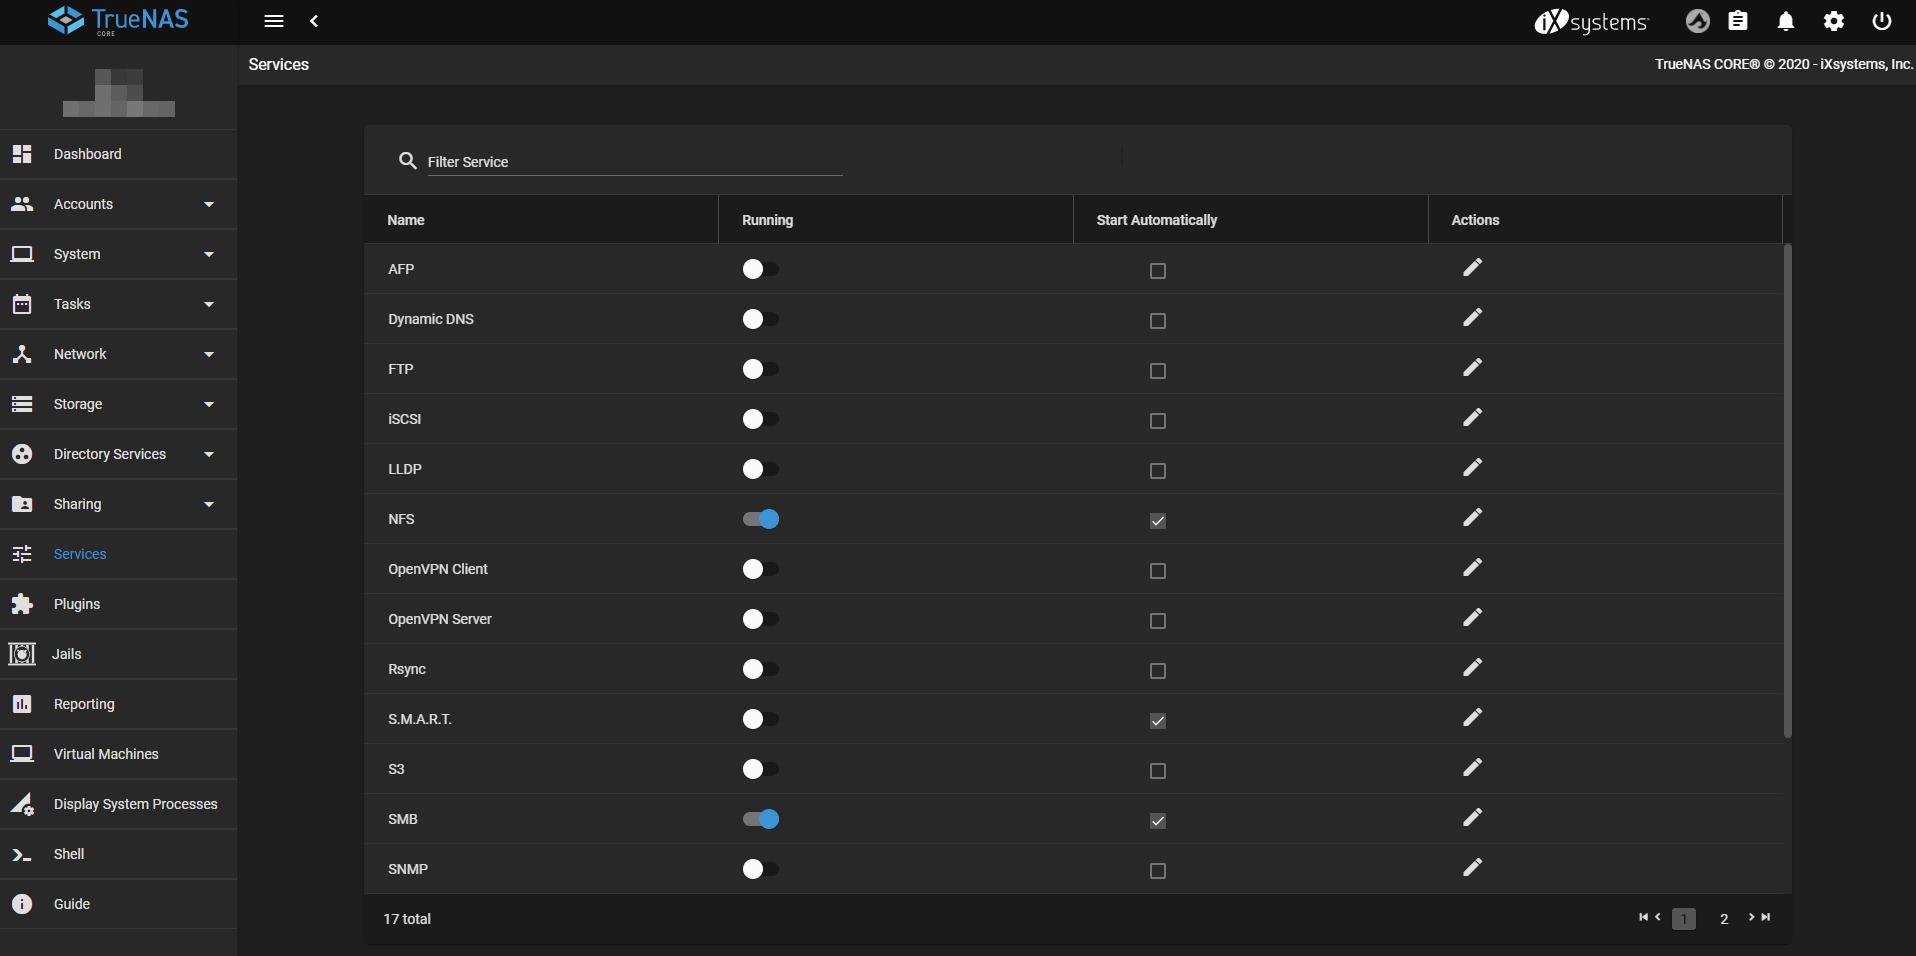
Firstly you need to configure the S3 service on the FreeNAS instance which you want to act as the backup instance. To do this, go to the Services section. Then click on the Configure button (the pen icon) in the S3 row:
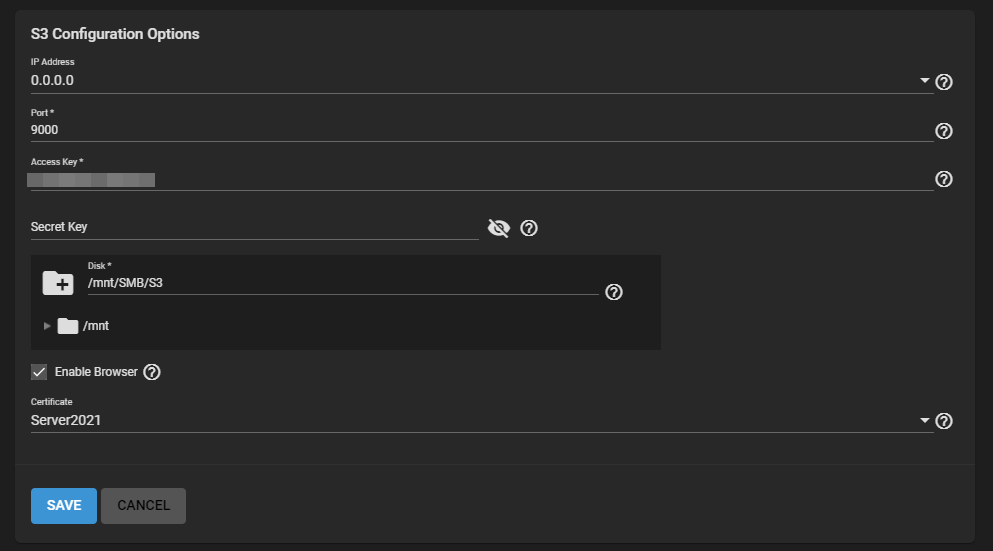
Next is set an Access Key and Secret Key. The Access Key needs to be a 20 character alphanumeric string. The Secret Key should be a sufficiently long alphanumeric string as well (at least 20 characters long, but the longer the better). Keep both safe and private, and make sure that they are randomly generated. Also select the mount point which you would like to use to store the data for your S3 bucket. Check the option Enable Browser if you would like to enable the MinIO Browser which will allow you to view your S3 buckets in a browser. Finally select the server certificate which will be used on your S3 service (this will typically be the same certificate which you use for the FreeNAS web interface).
Make sure that the mount point which you set on the S3 service has read and write permissions for the user minio. If you don't do this, the service will not start correctly. What I did is make minio the owner of the directory, as well as the group minio. Then add my own user to the minio group and ensured that the group had read and write access to the directory. You can set this by:
- Navigate to Storage -> Pools
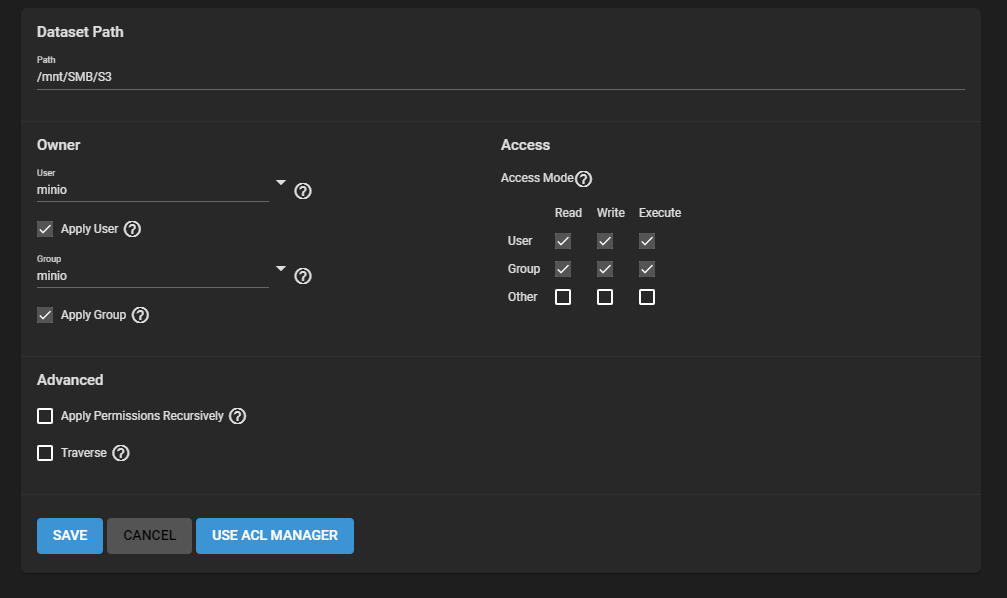
- Select Edit Permissions on the Dataset within the Pool which you set to store the data for your S3 service
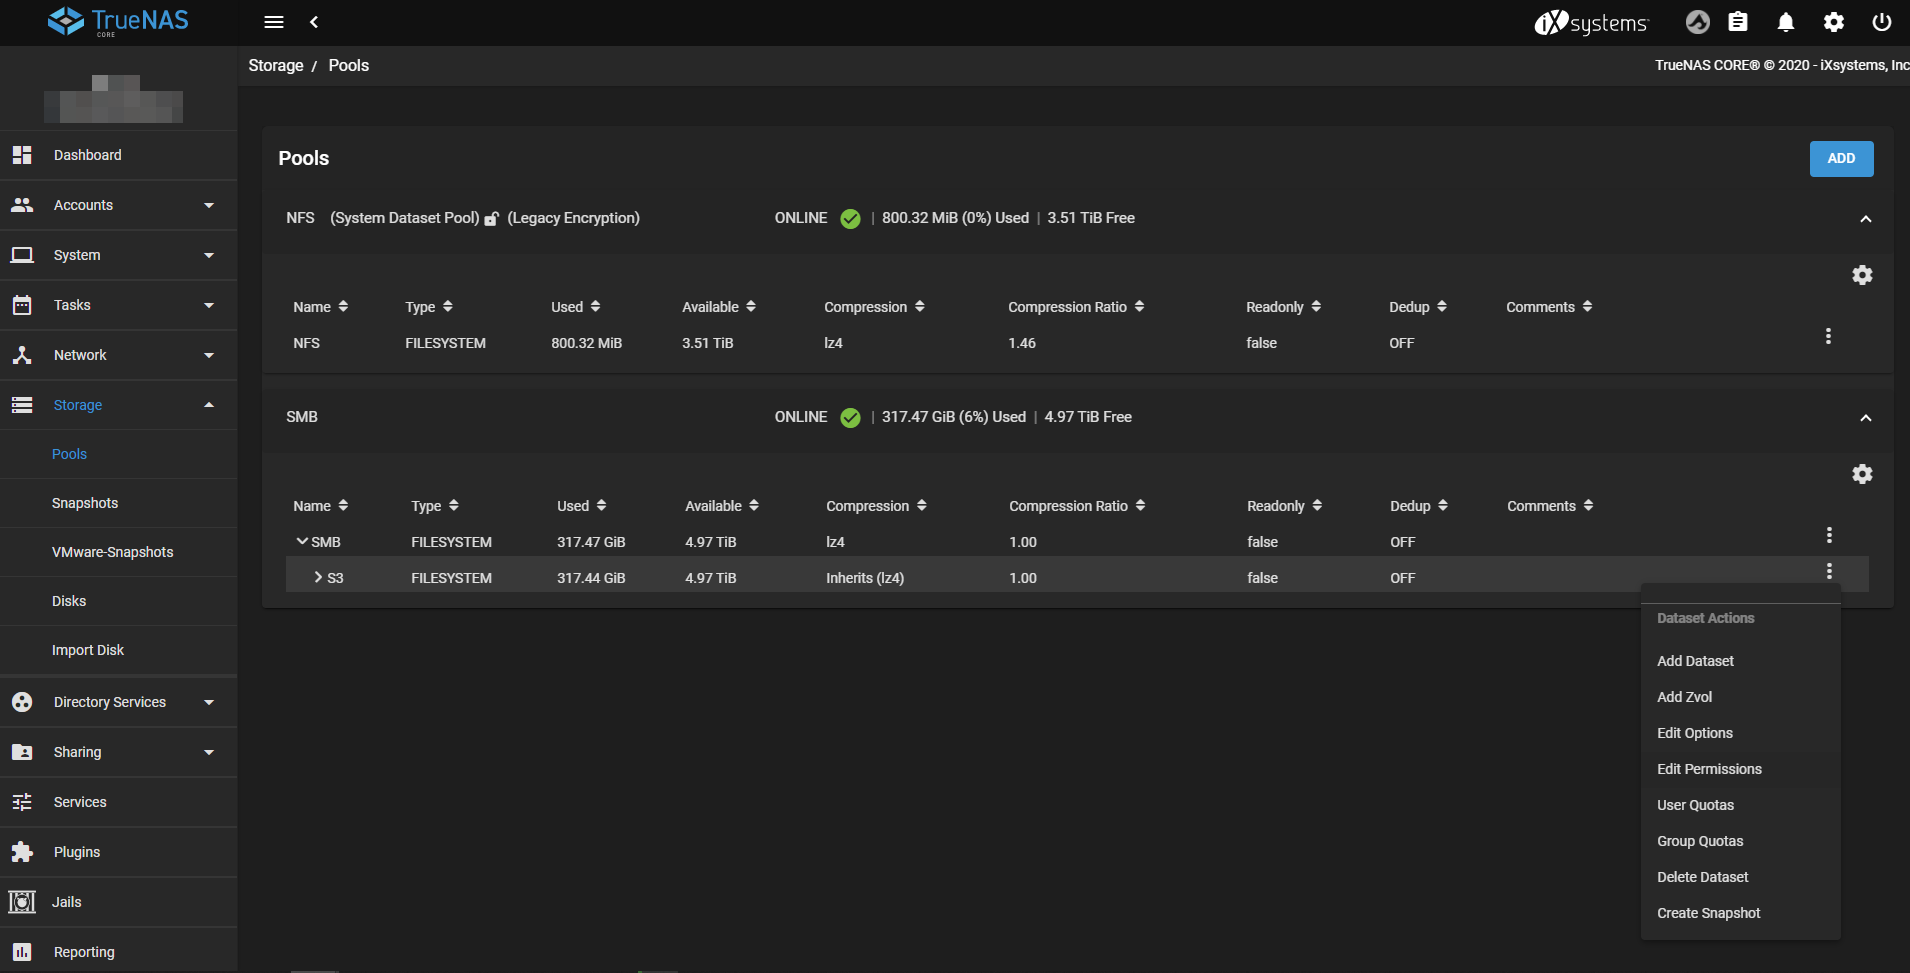
- The set the owner to minio and group to minio. Also make sure that both the owner an group have read and write access. Make sure that you also check the Apply User and Apply Group checkboxes. Click on the Save button to allow the changes to take affect
Finally back under the Services section, ensure that the checkbox Start Automatically is checked for S3 and start the S3 service.
Now switch over to the FreeNAS instance which you want to backup:
- Navigate to System -> Cloud Credentials
- Click on the Add button to add your S3 details
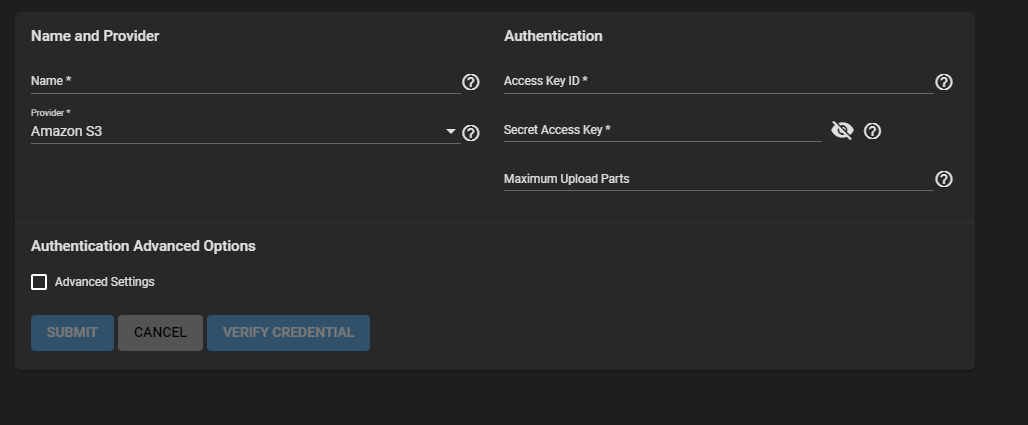
- Enter an appropriate name for the set of credentials
- Ensure that the Provider option is set to Amazon S3
- Finally add the Access Key and Secret Key to be the same as what you set above when you configure the S3 service on the backup instance
If you are running this internally you will likely have a certificate signed by a non-third party CA (private CA). You will then need to setup this CA on your instance:
- Navigate to System -> CAs
- Click on the Add button to add the CA
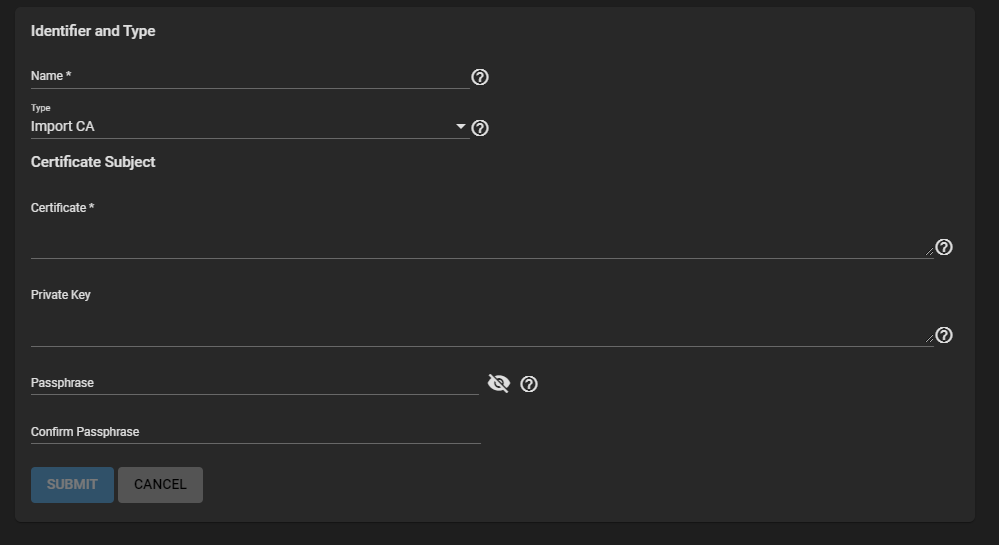
- Enter an appropriate name for the CA
- From the Type option, select the Import CA option
- Paste in the X509 certificate in the Certificate field
- Click on the Submit button to import the CA
You will also need to import the CA to Python's CA truststore:
- Navigate to Shell to obtain a shell to the server
- Run the command
python3 -c 'import certifi; print(certifi.where())' - Edit the file in the output of the command and add the X509 CA certificate to the end of the file
The final step is to setup the cloud sync task:
- Navigate to Tasks -> Cloud Sync Tasks
- Click on the Add button
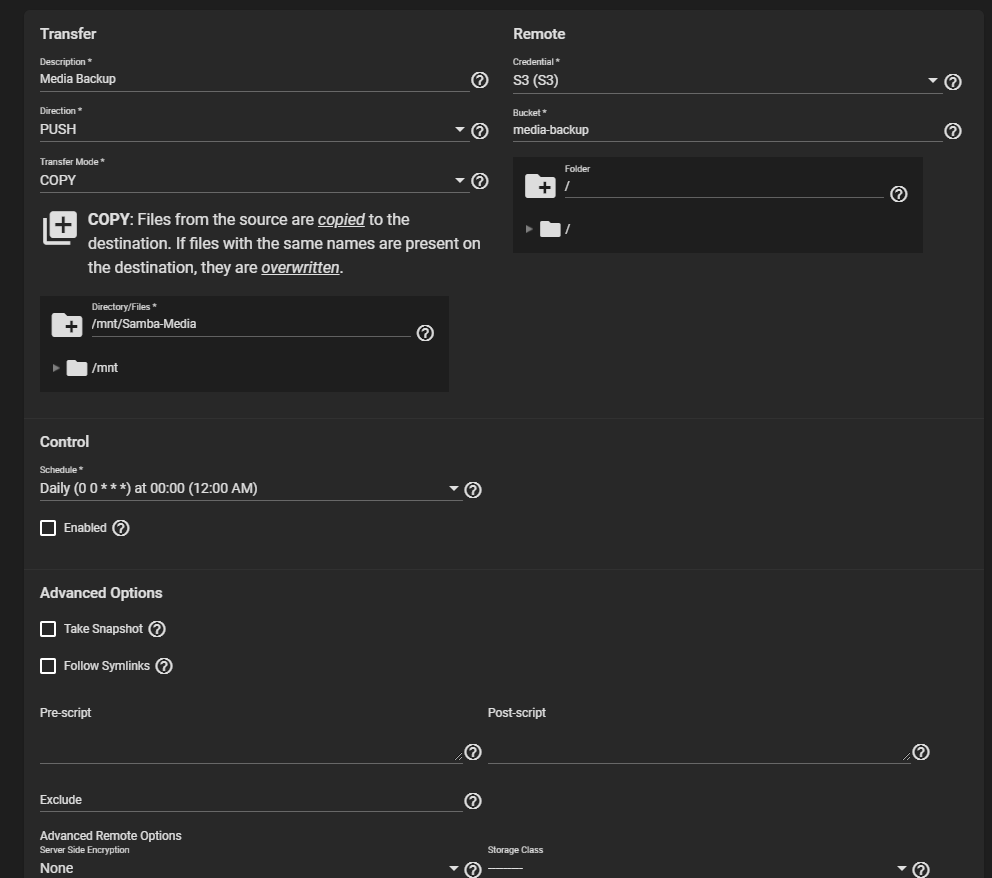
- Enter an appropriate name in the Description field
- In the Credential field, select the credentials which you configured above
- In the Bucket field select the S3 bucket which you would like to backup to
- In the Direction field select PUSH
- In the Transfer Mode field select COPY
- Select which mount point you would like backed up (sync'd)
- Set an appropriate schedule in the Control section
- Click on the Save button
If everything is done correctly you should be able to now view your S3 bucket by navigating to your S3 bucket on port 9000. You will need your access key and secret key to login.
A few things to note:
- You will probably need to add the CA to the certifi truststore after an update. There's perhaps a better way of doing this, so if you do know of a better way, please let me know.
- For the initial population of your S3 service, you might want to manually copy things across. I found that the initial sync never quite worked and it took forever to complete.
- Depending on the size of your data it can take quite a while for the sync task to complete.
- When creating a bucket, make sure that you create the new bucket through the MinIO web interface. I found that I ran into issues with adding files via MinIO otherwise. You can always test out your instance by attempting to upload a file via the MinIO web interface.