
For me this all started with some work related investigation which turned up that some devices on my personal home network were showing in my work's vulnerability report. For me this became apparent that the agent installed on my work laptop was scanning systems outside of my laptop (i.e. my home network). While I understand that this is what the agent is designed to do, and have no reason to believe that this was intentional by anyone, I still have a privacy concern about this. So I decided to segment my network so that my work devices would live in their own isolated network. I even Tweeted suggesting others do the same:
Tip for working from home. Many host based agents do scan systems outside of the host system. This means your corporate device can leak details of your internal home network. My suggestion, either create a VLAN for your corporate device, or buy a cheap router.
— Sean Wright (@SeanWrightSec) May 3, 2020
Being some what of a network novice, VLANs are a bit of a new thing for me. I've never attempted to set one up. So I tried to look online and while there are blog posts, they were still not entirely what I was looking for. So after spending some time, I thought I'd share my set on UniFi.
While I have used this for segmenting my work devices from my home network, you can create additional VLANs to segment other devices such as IOT devices from other devices on your home network.
Step 1 - New Network
The very first step is to create the new VLAN. In UniFi this is done by going to Settings -> Networks -> Local Networks. Then click on the Create New Local Network button in the bottom right of the page.

- Select the Create Advanced Network option. Enter an appropriate name for the new network.
- In the VLAN ID field enter a numeric ID (must be 2 or greater).
- Make sure that the IP range for the Gateway IP/Subnet and DHCP Range fields differs from your local home network (typically the LAN network).
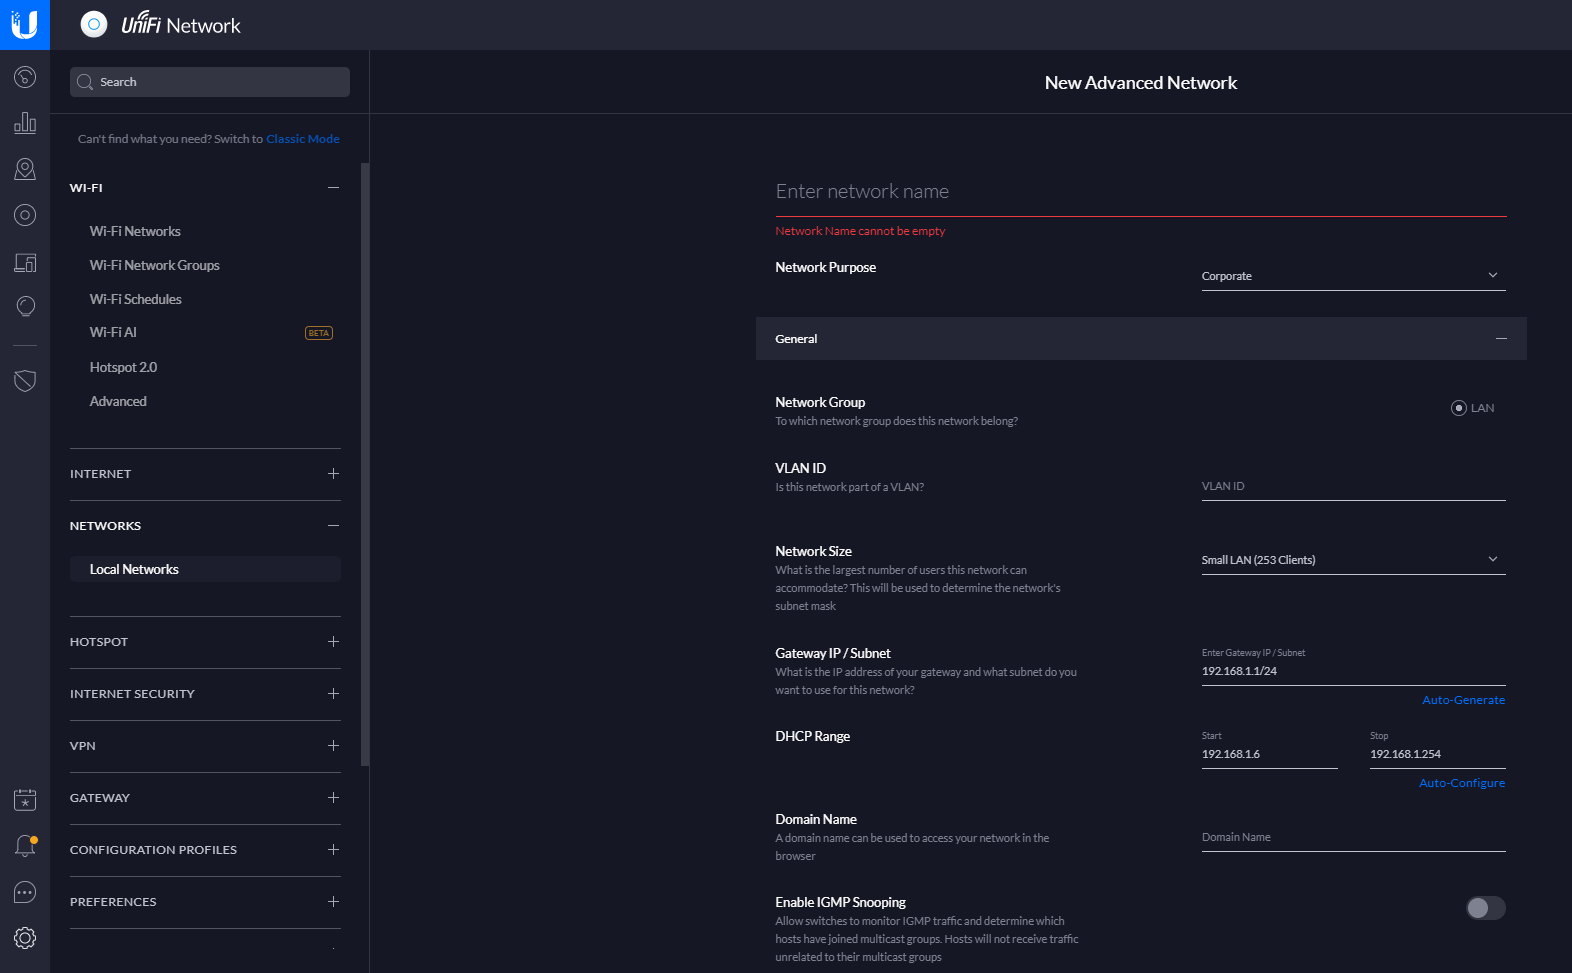
Leave the other options as is, unless you need to modify them.
Step 2 - New WiFi
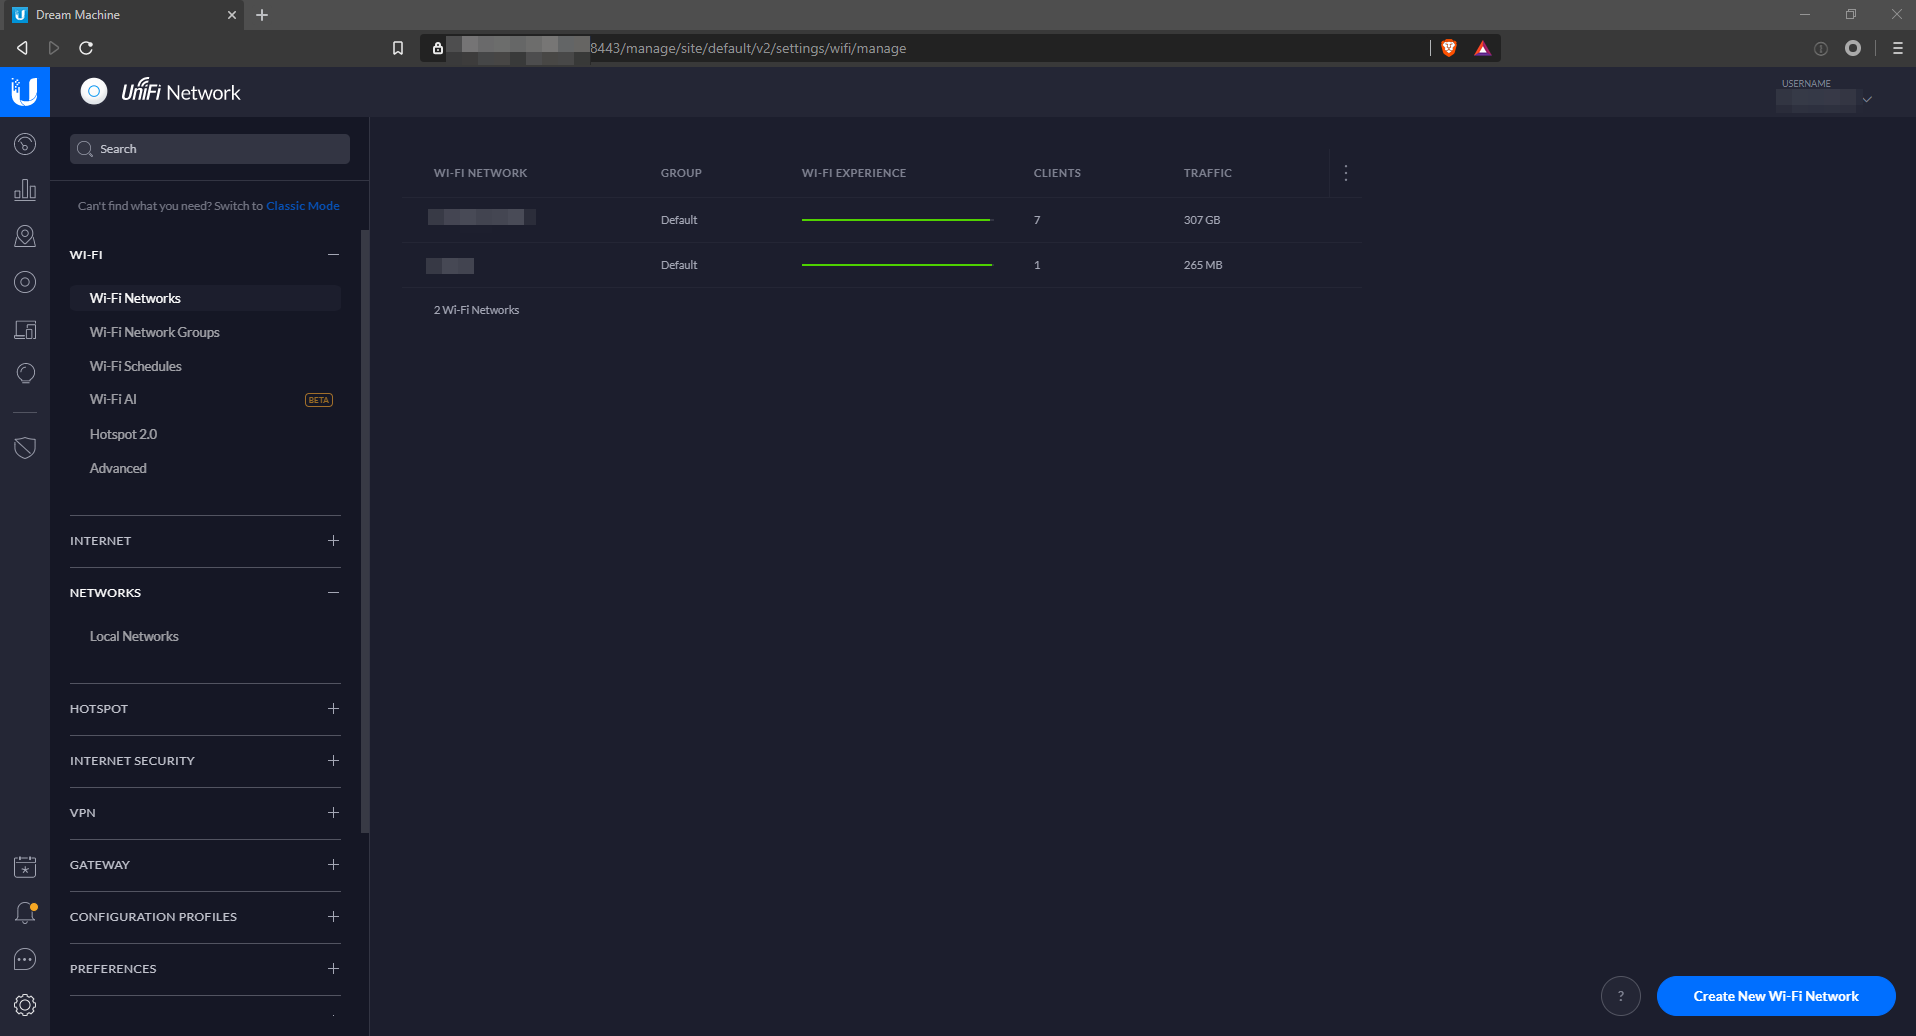
The next step is to create the a new WiFi network. In UniFi this is done by going to Settings -> WI-FI -> Wi-Fi Networks. Then click on the Create New Wi-Fi Network button in the bottom right of the page.
- Select the Create Advanced Wi-Fi option. Enter an appropriate name for the Wi-Fi name (SSID).
- Set the appropriate password in the Wi-Fi Password field.
- Enable the option Use a VLAN, and set the VLAN ID to be the same value as the VLAN ID as which you gave to the new network which you created above.
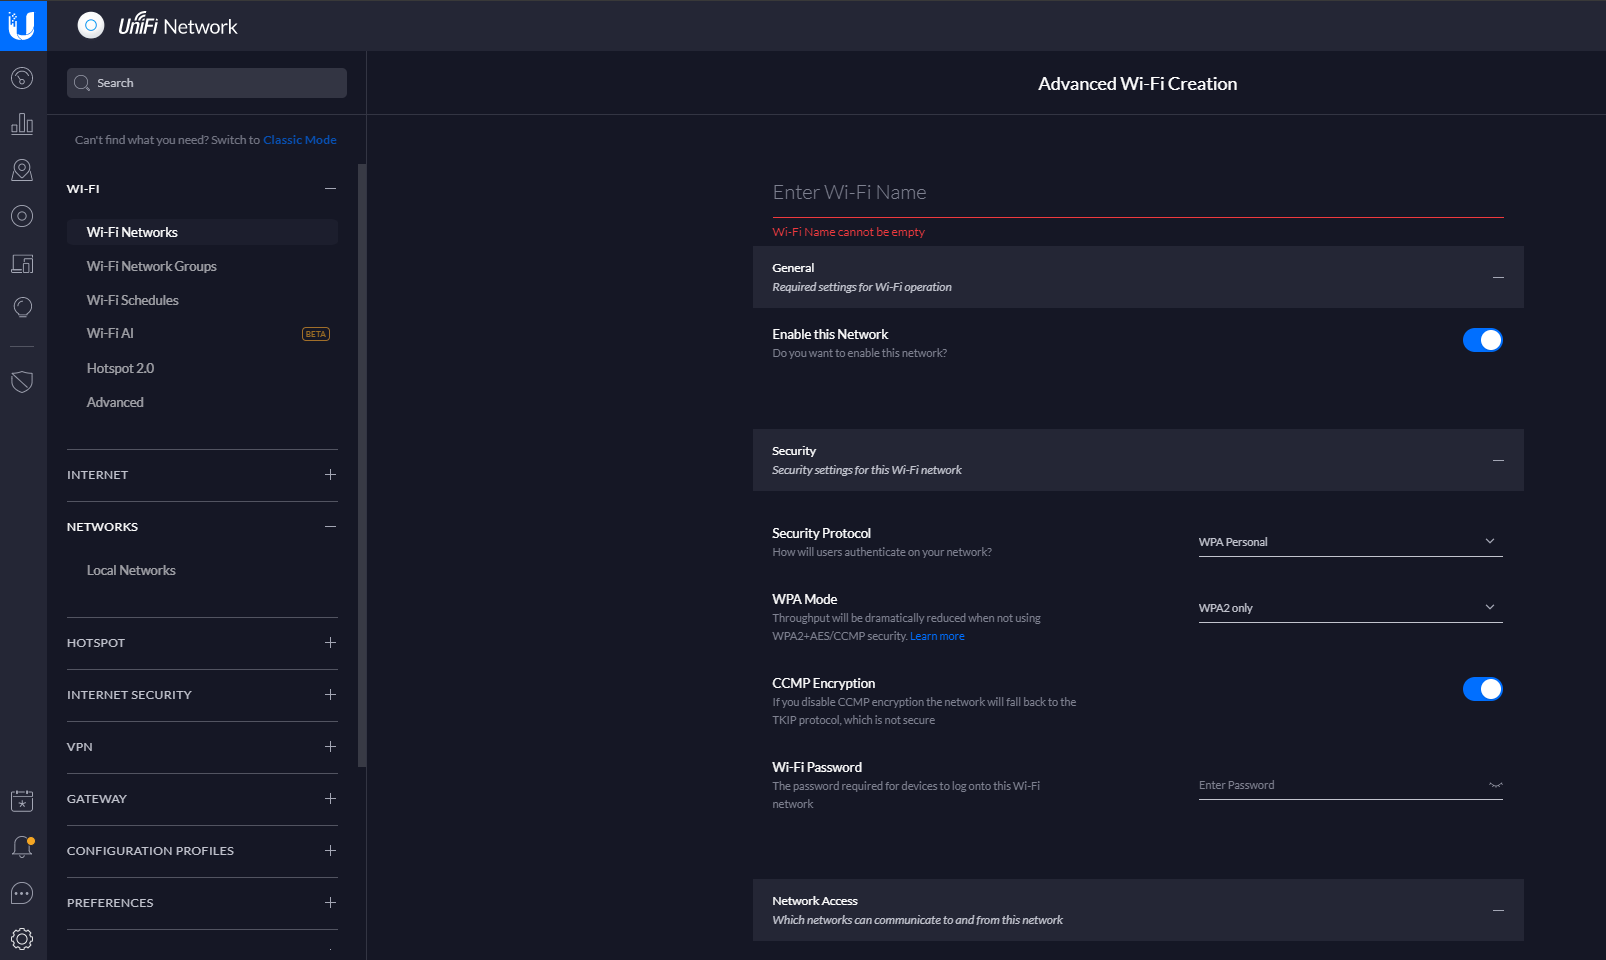
Leave the other options as is, unless you need to modify them.
Step 3 - Firewall
The next step is to configure firewall rules to isolate your new work VLAN from your home network. To do this in UniFi go to Settings -> Firewall.
Under the Groups section, click on the Create New Group link (you will need to create 2 groups, 1 for your work VLAN and 1 for your home network).
- Enter an appropriate name in the Name field.
- Select IPv4 Address/Subnet in the Type field.
- In the address field, enter the CIDR range for the group (you can get this by view your Local Networks screen from by view Settings -> Networks -> Local Networks).
Next is to create the firewall rule to block access. Under the Rules section select the Create New Rule link:
- Set the Type field to LAN In.
- Enter an appropriate description in the Description field.
- Make sure that the Enabled option it enabled.
- Set the field Rule Applied to Before Predefined Rules.
- Set the field Action to be Drop.
- Ensure that the field IPv4 Protocol is set to All.
- In the Source section
- Set the Source Type field to Network.
- Set the Network field to be your work network group which you created above.
- Set the Network type field to be IPv4 Subnet.
- In the Destination section
- Set the Destination Type field to Network.
- Set the Network field to be your home network group which you created above.
- Set the Network type field to be IPv4 Subnet.
- Click on the Apply button.
Step 4 (Optional) - Switches
This step is optional and only if you have a UniFi switch.
- In UniFi, select the switch which you wish to configure, from the Devices screen.
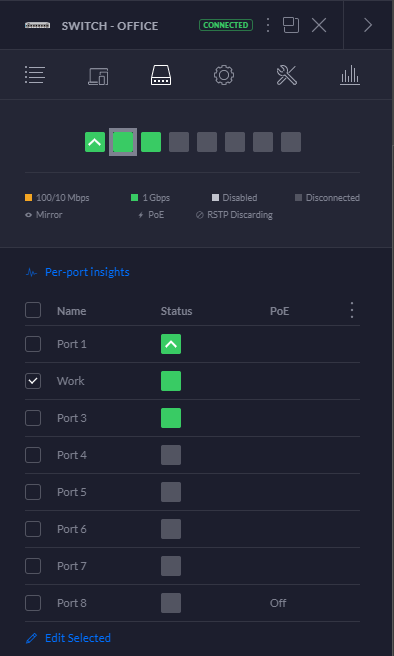
- Select the Ports tab of the switch.
- Select the port which you wish to segment of (i.e. the ports which contains the devices which you wish to segment), and select the Edit Selected link.
- You can give the port a name using the Name field.
- In the field Switch Port Profile, select the new work VLAN.
- Click on the Apply button.
I did notice in my case it did change all the ports to become my new work VLAN, so I had to change them back to be my local home network (under the Switch Port Profile field for each port). Additionally I left my uplink port to be set to All under the Switch Port Profile field.
Hardware
These instructions should work for any Unifi enabled devices. For my setup I have the following: